
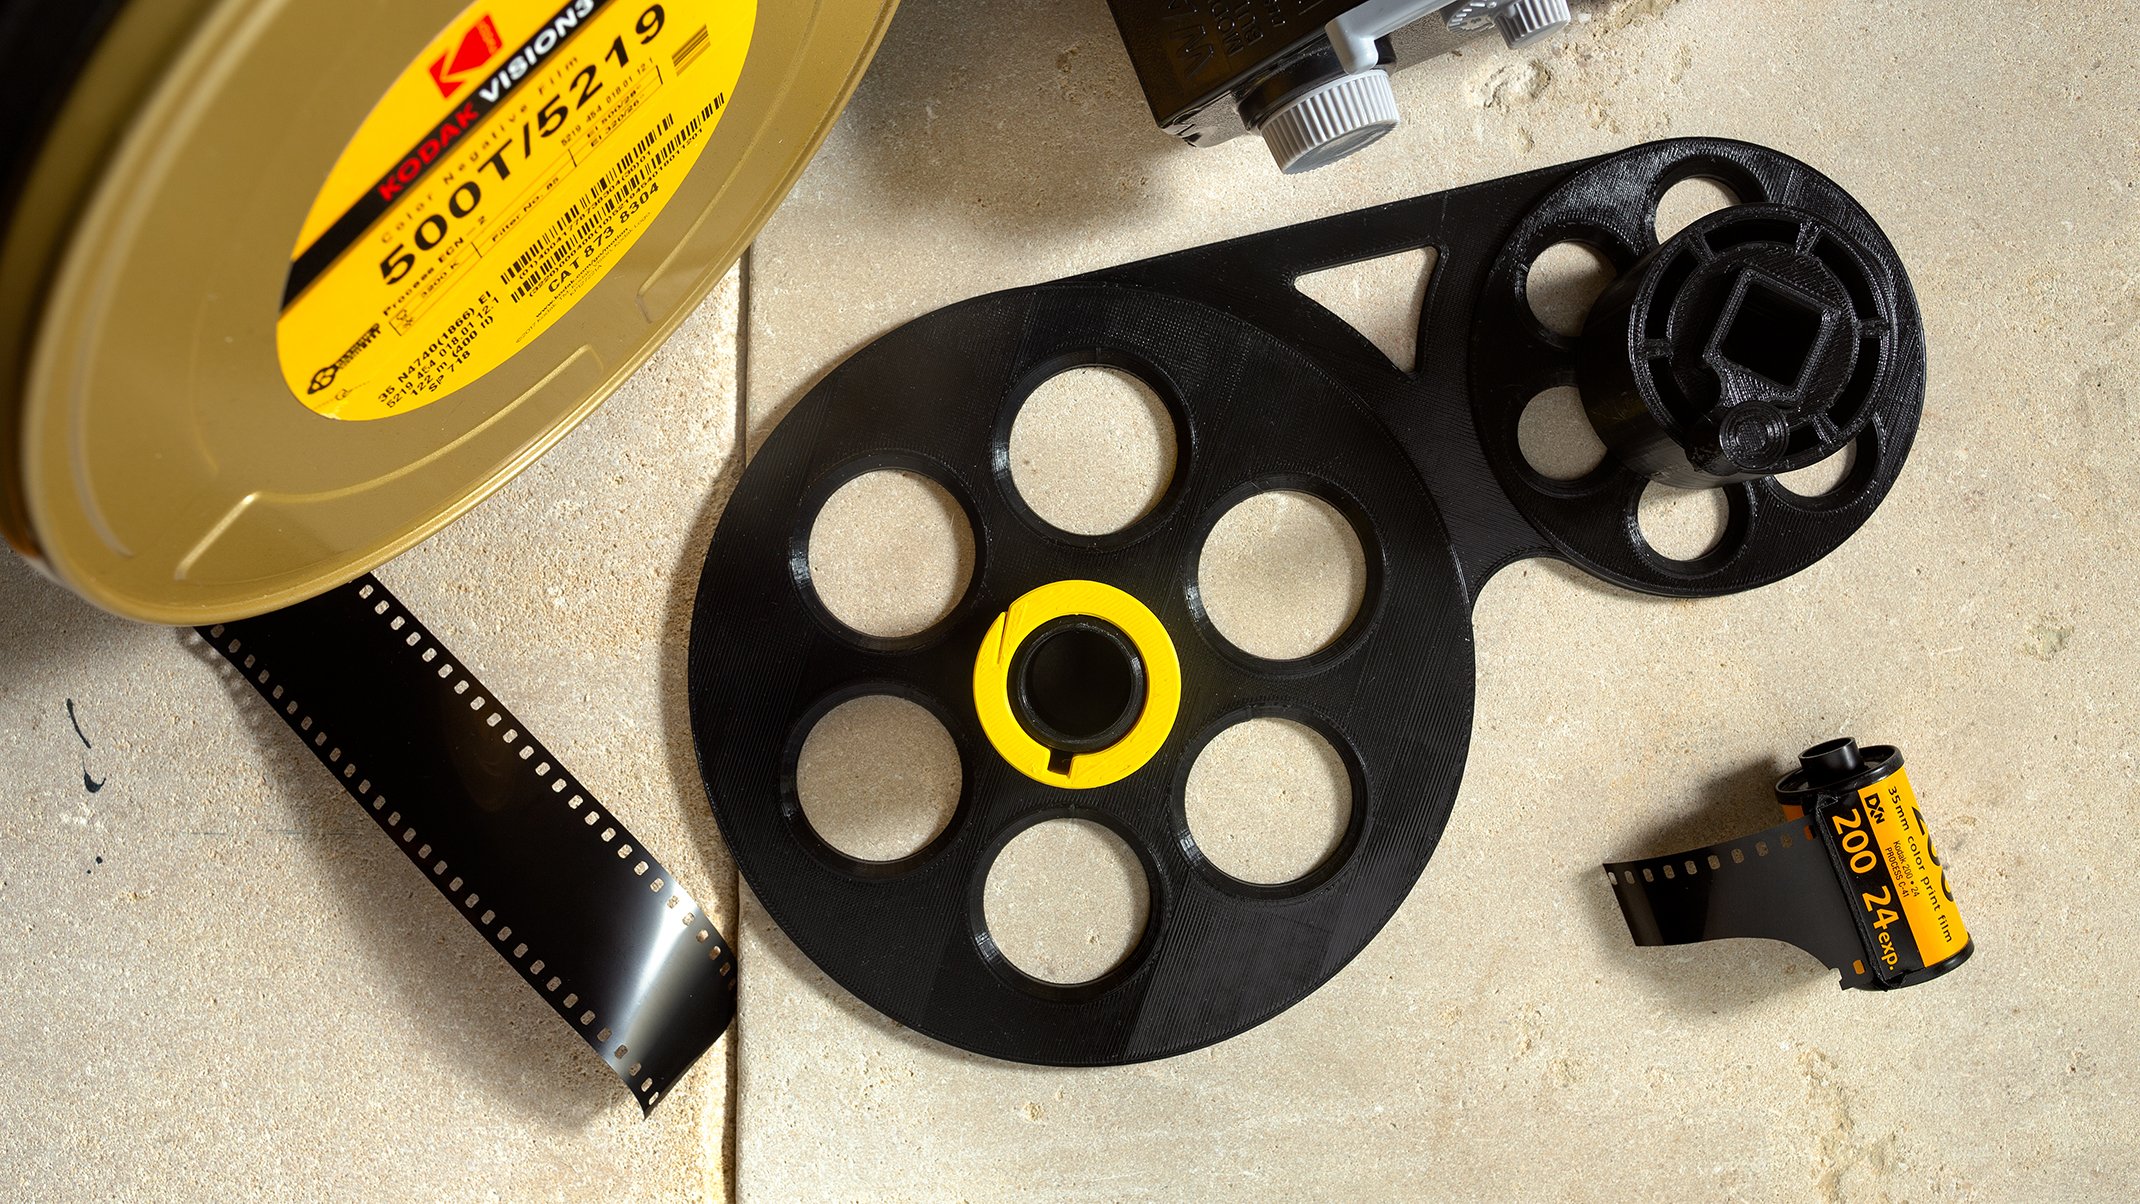
How do I cut a 400ft roll down to 100ft to use it with my bulk loader?
As cinema film is growing in popularity and as we are just a few days away from yet another Kodak Alaris price increase, I think there is no better time to address the bulk rolling of motion picture film.
The main focus of this article is the respooling of 400ft rolls to 100ft. I will not address the bulk rolling part as there are many great videos and blog posts out there that will help you get started if you’ve never done it before. I will put links at the end of this page with some of these so you can use this article as a resource.
The Design
It’s simple. Not the smoothest piece of equipment but it gets the job done. It’s small enough to fit in your dark bag (for reference the one I’m using is 64cm x 70cm) along with the 400ft can, the bulk roller, scissors and scotch tape.
It has 3 parts. The main piece, the core and the crank. On the left side of the main piece is where you insert the big roll and from the right side is where you’ll get your 100ft roll. So on to respooling.
Respooling
Once you have everything in the dark bag, open up your film can and remove the big roll. It’s going to be protected from a plastic bag, open it up and get the reel.
Now feel the roll until you find the end of the film. It’s going to be taped onto itself, imagine something like an oversized scotch tape. Find the end and remove the sticker to let it loose. Now hold your film with the loose end pointing to the right, towards the smaller reel (reference photo bellow) and place it on the left side.
Extend the film and use a piece of tape to stick it onto the take up spool.
Now you are ready to start spooling. Insert the crank in the core and while lightly holding the big roll (just to keep some tension) start cranking clockwise.
The person who designed this has advised that by giving the handle about 140 full rotations you will end up with 100ft of film on the take up spool. Another way to judge it is when the film reaches 2 to 3mm from the edge of the sidewall. Now just to be on the safe side, I prefer to leave some extra space from the end (less than 140 turns if you are counting) just to avoid overdoing it and then having to cut it again. You don’t have to do that, it’s just me playing it safe.
Once you are done spooling, cut the cord and reapply the tape that was holding the 400ft roll. Place the big roll back into the plastic bag and into the tin.
Remove any slack from your 100ft roll, lift it up and insert it into your bulk loader.
From then on you proceed as usual.
Don’t forget to reapply the tape along the perimeter of the tin and place the rest of the film in a ziplock bag and into the freezer if you are not shooting that much. It is advised to use it as fresh as possible.
Now a piece of advice, please be as familiar as possible with your equipment. It will save you time and mistakes. It’s good practice to know everything on your bulk loader, even blindfolded. Practise this stuff before doing the respooling.
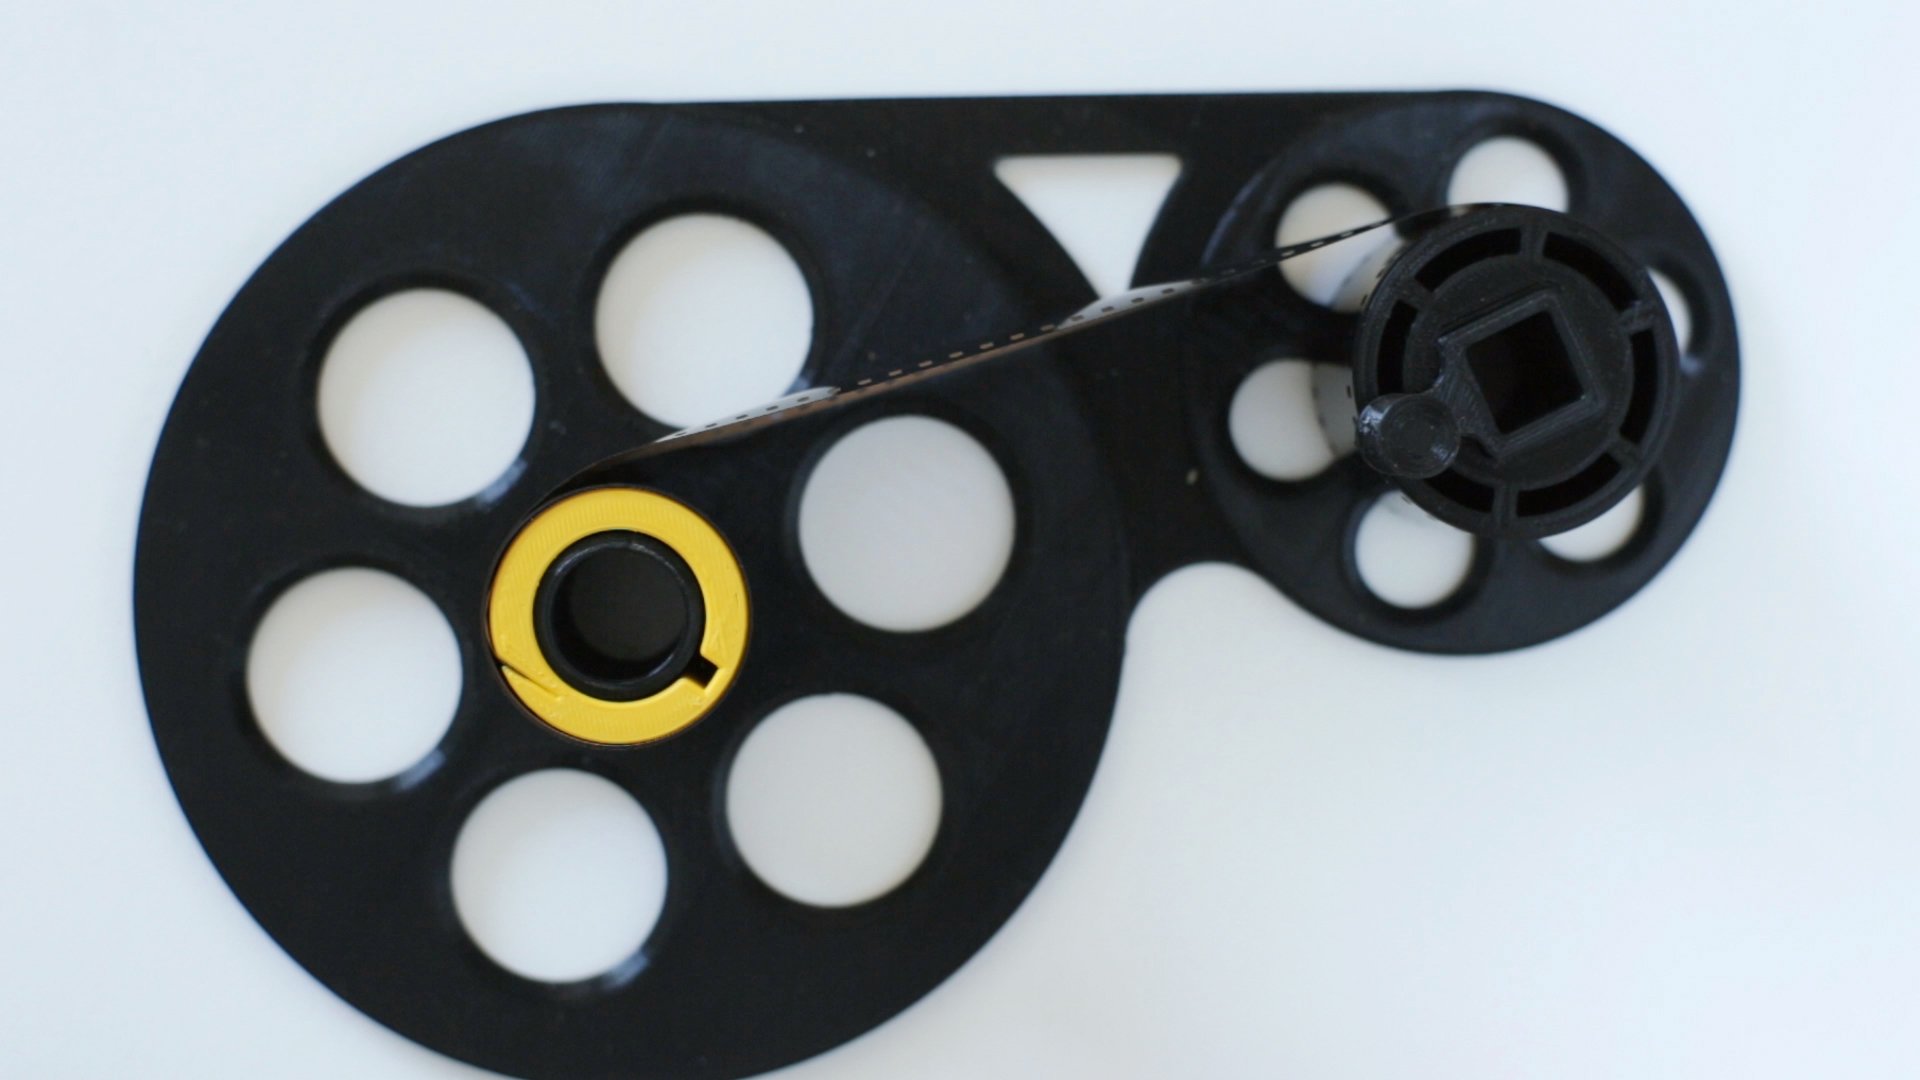
As described, 400ft roll should be on the left side with the film extending from the top, taped to the take up spool on the right side. (Note: This is only for illustrative purposes. It should be done in total darkness.)
Where do I get that?
This piece is 3D printed and the design is created by someone under the name broken_perfectionist.
You can find it on Thingiverse (a website where people share their 3D designs) and it’s free to download and use. Though I would highly suggest to tip the creator since without them we wouldn’t have this piece.
Once you download the files you will need to 3D print them. This means you either need a 3D printer along with the knowledge of operating it or you need to send the files to someone who can do that for you. I don’t have a printer or the knowledge to use one so I went with the second option. Luckily there is website called Fiverr which purpose is to connect freelancers offering various skills with buyers. This simply means you can find graphic designers, 3D artists, videographers, musicians… and the list goes on. In this case I needed someone to handle the printing for me.
I found various people able to do that, took an offer and assigned it to someone who is local to me. From contacting the person to having the finished product on my doorstep, took around 5-7 days and cost me £32, something that I found to be reasonable.
Now a few more things before you go on to downloading the files. You will notice there are several versions. As with all designs, things tend to get improved once the creator has more feedback and experience using the item.
I went with the latest version which doesn’t require any assembly.
This means I used the followings files:
1- Version_2.1_400ft-100ft_spool_base.stl
2- Version_2.0_100ft_spool.stl
3- Version_2.0_100_foot_crank_handle.stl
The previous version had the base in two separate pieces which you had to connect.
And lastly, apart from reading this article please take the time to read the creator’s instructions and advice.
Here is the link to the design:
https://www.thingiverse.com/thing:4868217
Epilogue & Resources
I was first introduced into the idea of using cinema film for stills back in 2019 when I learned about Silbersalz. An amazing team of people with a great product/service. I have shot various cine film stocks and have always been very happy with the results. They offer great latitude with a flatter starting point that lets you color grade to your hearts content.
The fact that with the current prices it makes shooting film much cheaper is just an added bonus. Buying, developing and scanning Kodak Vision3 film will cost you around £5-£6 per roll if you develop and scan at home. A single roll of Portra 400 with dev&scan at a lab can easily go north of £30. That’s not to say I’m going to ditch Portra or other films, contrary the very reason that I’m bulk rolling is that it gives me the ability to shoot cheaply while freeing up some cash to experiment or shoot the more expensive film stocks when I need to.
As I said in my previous blog post, if I choose to shoot Kodak Colorplus then I want this choice to be creatively driven and not financially. Bulk rolling along with developing and scanning at home helps me achieve that.
Now on the product mentioned in this article, it’s worth saying that the more people getting interested in bulk loading cinema film the more of these products we’ll see being created. I’ve already noticed another one which lets you load the whole 400ft roll. So keep an eye out as things are progressing.
And then of course for those who don’t need 72 rolls or can’t invest in that, there are two options. You can either split the costs with a friend or two and divide the rolls or you can just buy from eBay. Many people are respooling and selling cinema film online. Try to buy from a source that is selling loads of it as it will probably be fresher.
Lastly, feel free to comment down below wether you have a question or you want to share your own technique/approach to bulk loading from the 400ft roll. Or if you found any inaccuracy, please let me know in the comment section. I’m looking forward to learning from other peoples experiences as well.
And now the resources.
Resources
Note: Some of the following are affiliate links. Using them comes at no extra cost to you, but it helps support me with a small commission on qualifying purchases.
Introduction and tutorials to bulk loading 35mm film
Available Tools for Bulk Loading
Bulk Loader - https://amzn.to/3XdVLVQ
Changing Bag - https://amzn.to/45cAei6
Thingiverse Respooler